Substituting dFac Users
- Print
- DarkLight
- PDF
Substituting dFac Users
- Print
- DarkLight
- PDF
Article summary
Did you find this summary helpful?
Thank you for your feedback!
To enable another dFac or iForms user to approve your workflow actions, you can use the substitution rules in the Universal Worklist. The substitution rules route all of your dFac and iForms actions to your substitute temporarily, depending on how you set up the substitution rules.
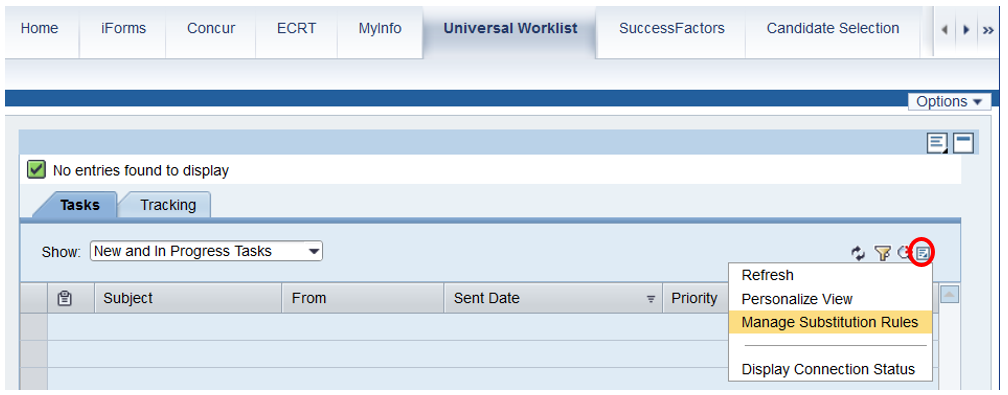
To set up substitution rules, go to your Universal Worklist and click the pull-down icon under the Refresh link. A pop-up menu appears. On the pop-up menu, select Manage Substitution Rules.
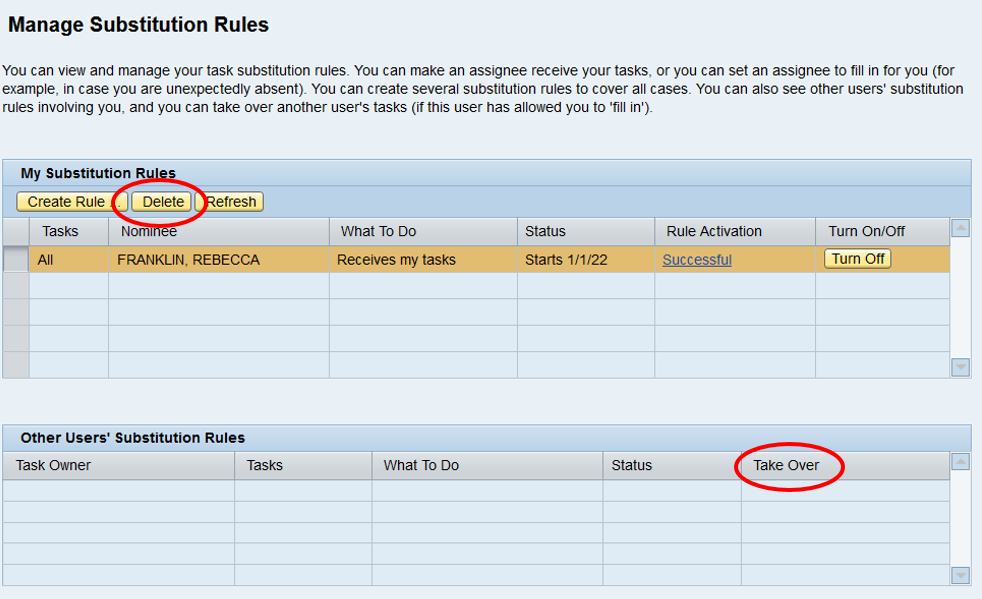
The Manage Substitution Rules window is displayed.
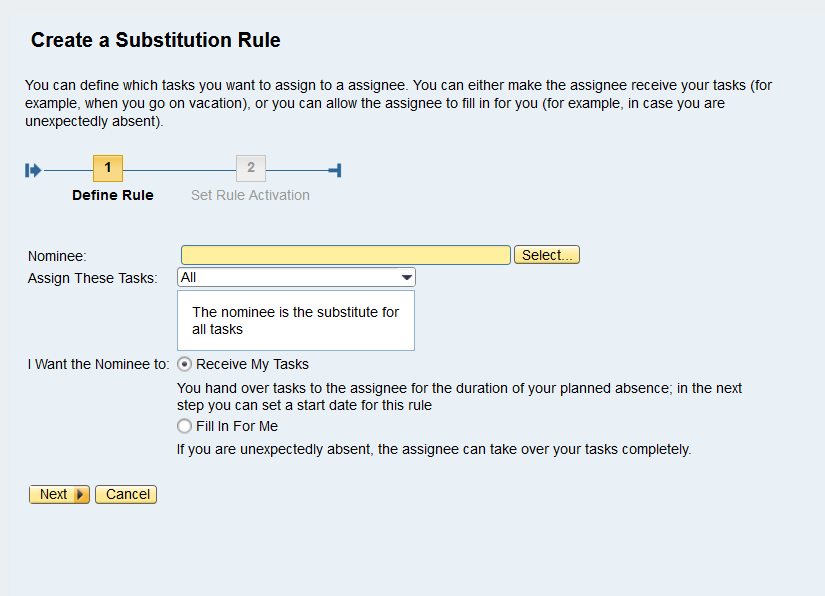
Create a Substitution Rule
1. Click the “Create Rule” button to begin setting up a substitution rule.
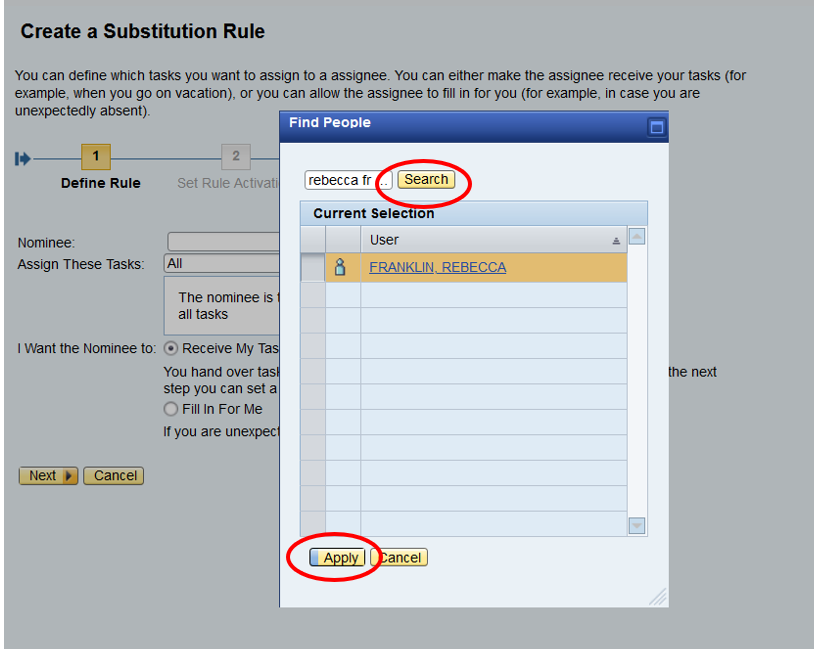
2. Select a substitute approver by clicking the Select button.
3. Type the substitute user’s name in the Search for Names box and click Search. When the correct name appears, click Apply.
4. In the Create a Substitution Rule dialog, leave the default value, “All” under Assign These Tasks.
5. Next specify how when your actions should route to the substitute approver using the choices under “I Want the Nominee To:”
| Receive My Tasks: | Sends all your Worklist items to your substitute as soon for a specific time period. This choice works well for absences that you have planned, such as vacations or leaves. |
| Fill In For Me: | Sets up your substitute approver for an ongoing time period. With this choice, your substitute can take over your tasks during absences that you have not planned. Your substitute receives your tasks by clicking “Take Over Tasks” in their Manage Substitution Rules dialog. |
6. Click Next to continue to set the date for activating the rule.
Activating the Rule
After defining the rule and clicking Next, you’ll set the rule activation date.
1. Decide when the rule should start.
You can choose “At Once” to turn on the rule immediately. To turn on the rule in the future, type a date into the date field or select it with the calendar widget.
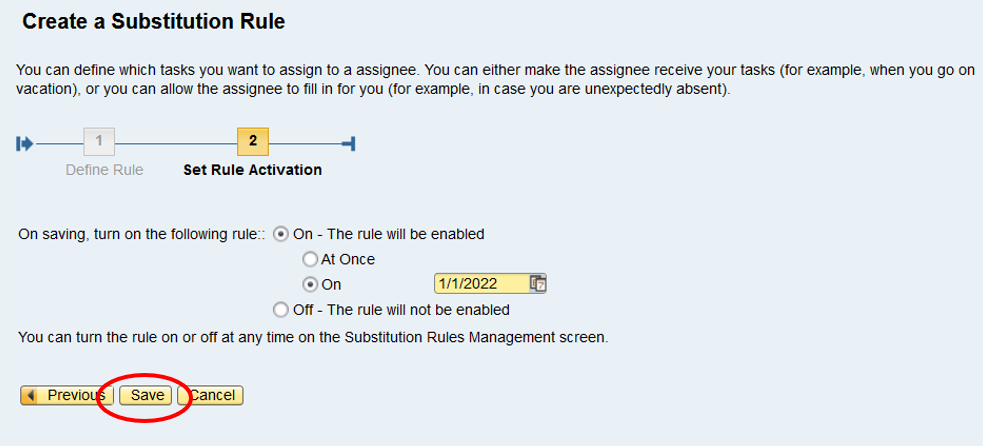
2. Click Save to save the rule.
You’ll return to the Manage Substitution Rules dialog.
Managing Substitution Rules
After you’ve created a substitution rule, the Manage Substitution Rules dialog displays the rules you’ve created in the top list box.
- You can delete any rule you’ve created by highlighting the rule and clicking the Delete button.
In the bottom list box, you can see substitution rules that others have set up for you to act as a substitute approver.
- To begin approving the task owner’s Worklist items, click the Take Over button. The button changes to End Take-over which stops their items from being sent to you.